Add Connection
How to add Connection
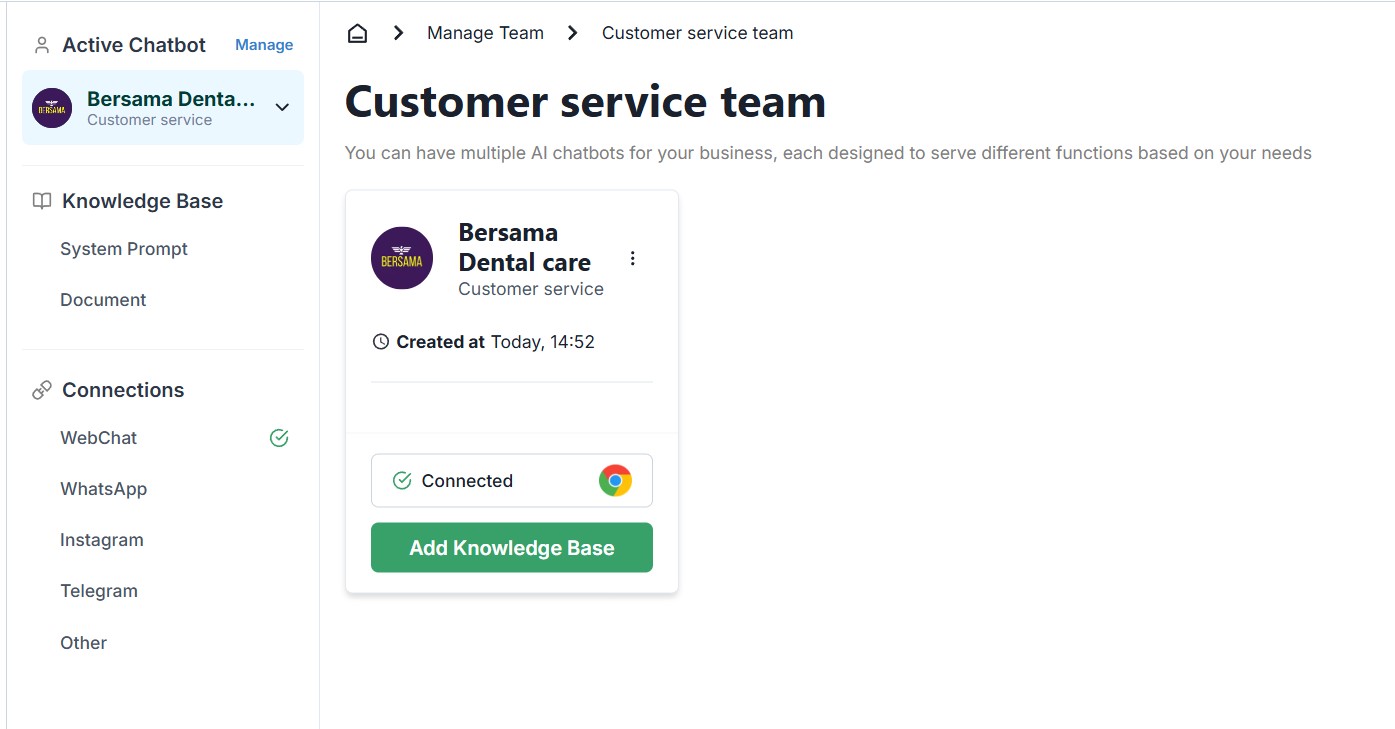
Before adding a connection, you need to create a chatbot first, as shown in the example below.
- Once your chatbot has been successfully created, open the Chatbots menu and click Connect. You’ll then be directed to the page where you can add a connection.
- Or You can also go directly to the Connection page.
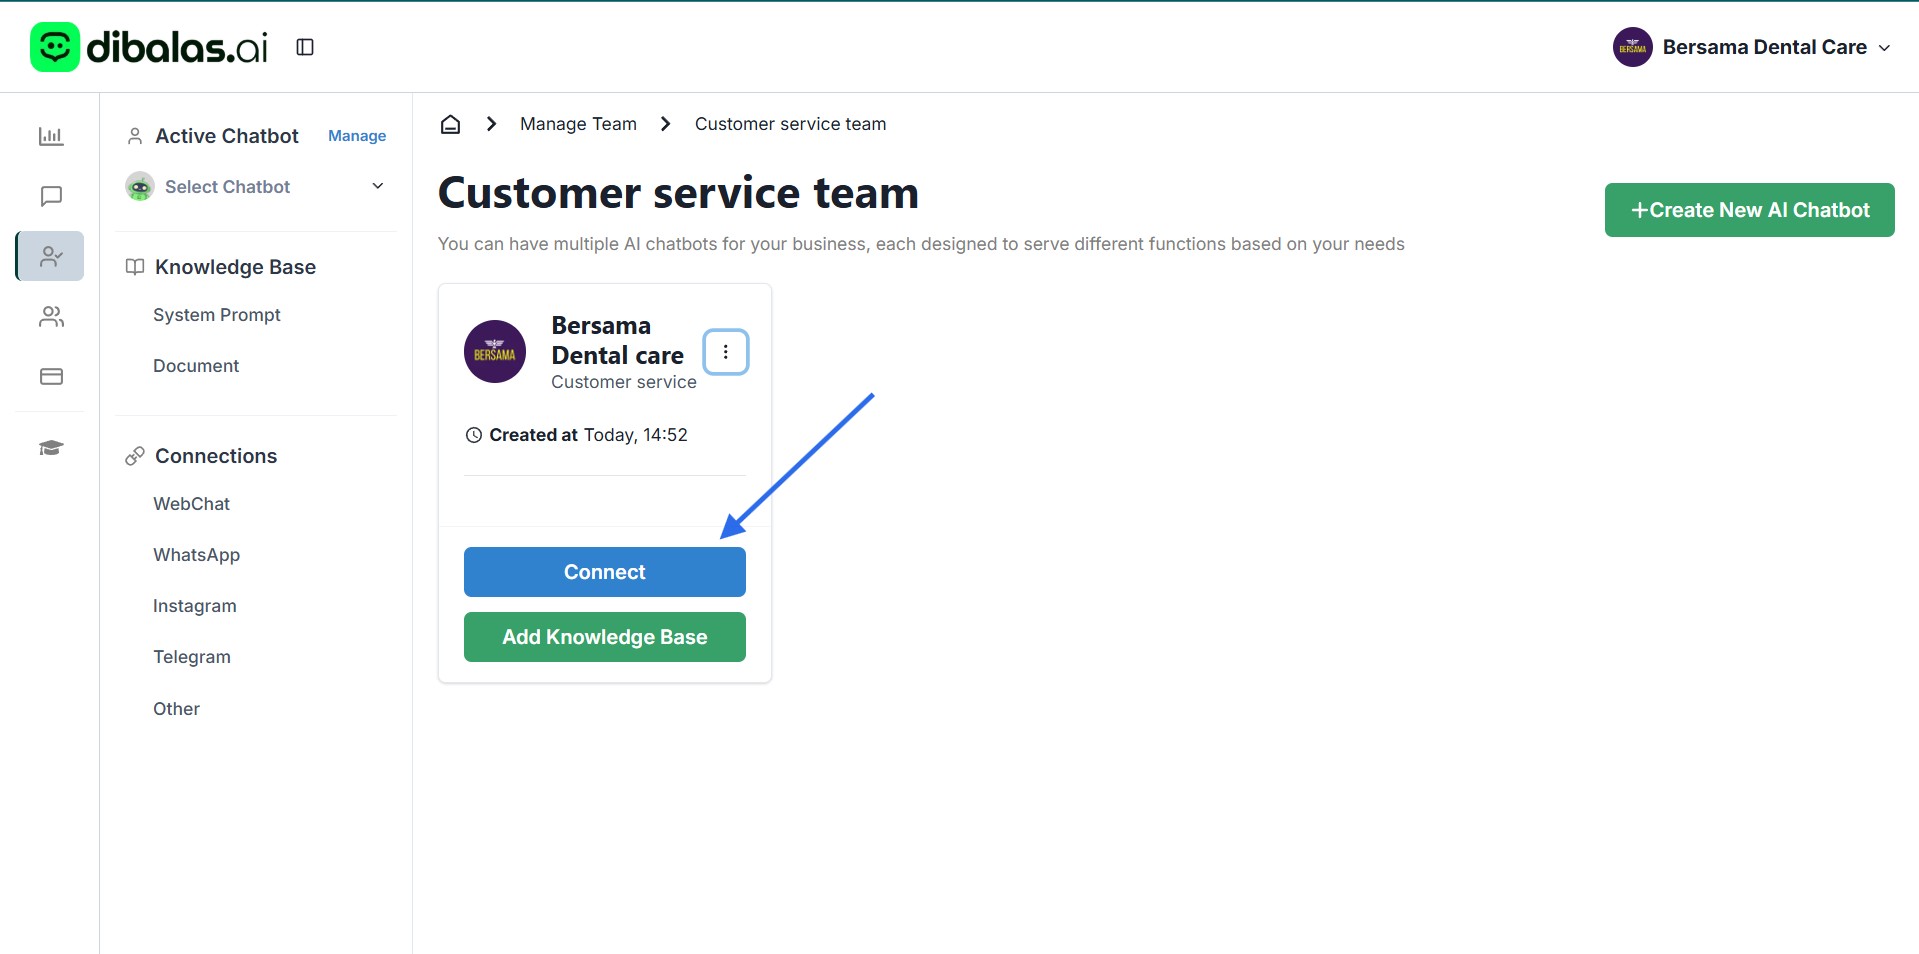
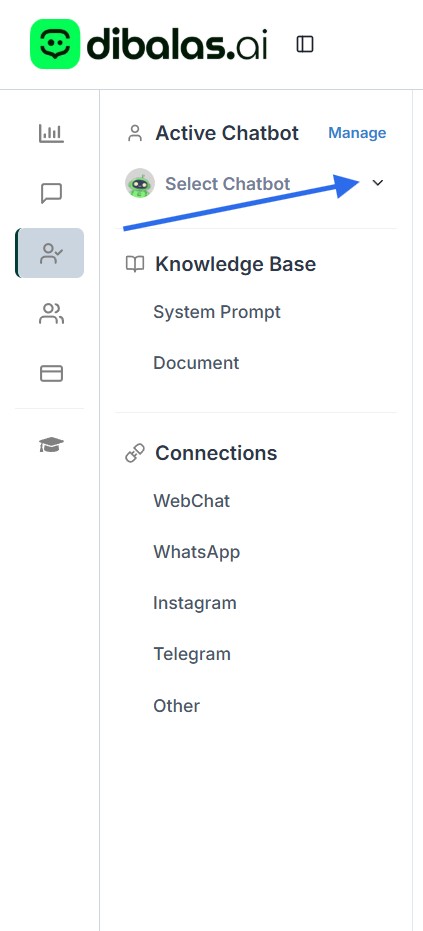
You need to select a chatbot first if not selected. Make sure you’ve already Create Chatbot beforehand.
Click the dropdown. After that, choose the chatbot’s name from the dropdown menu to continue.
- Then you will see the ‘Connections’ submenu, which contains several connection options you can choose from, such as webchat.
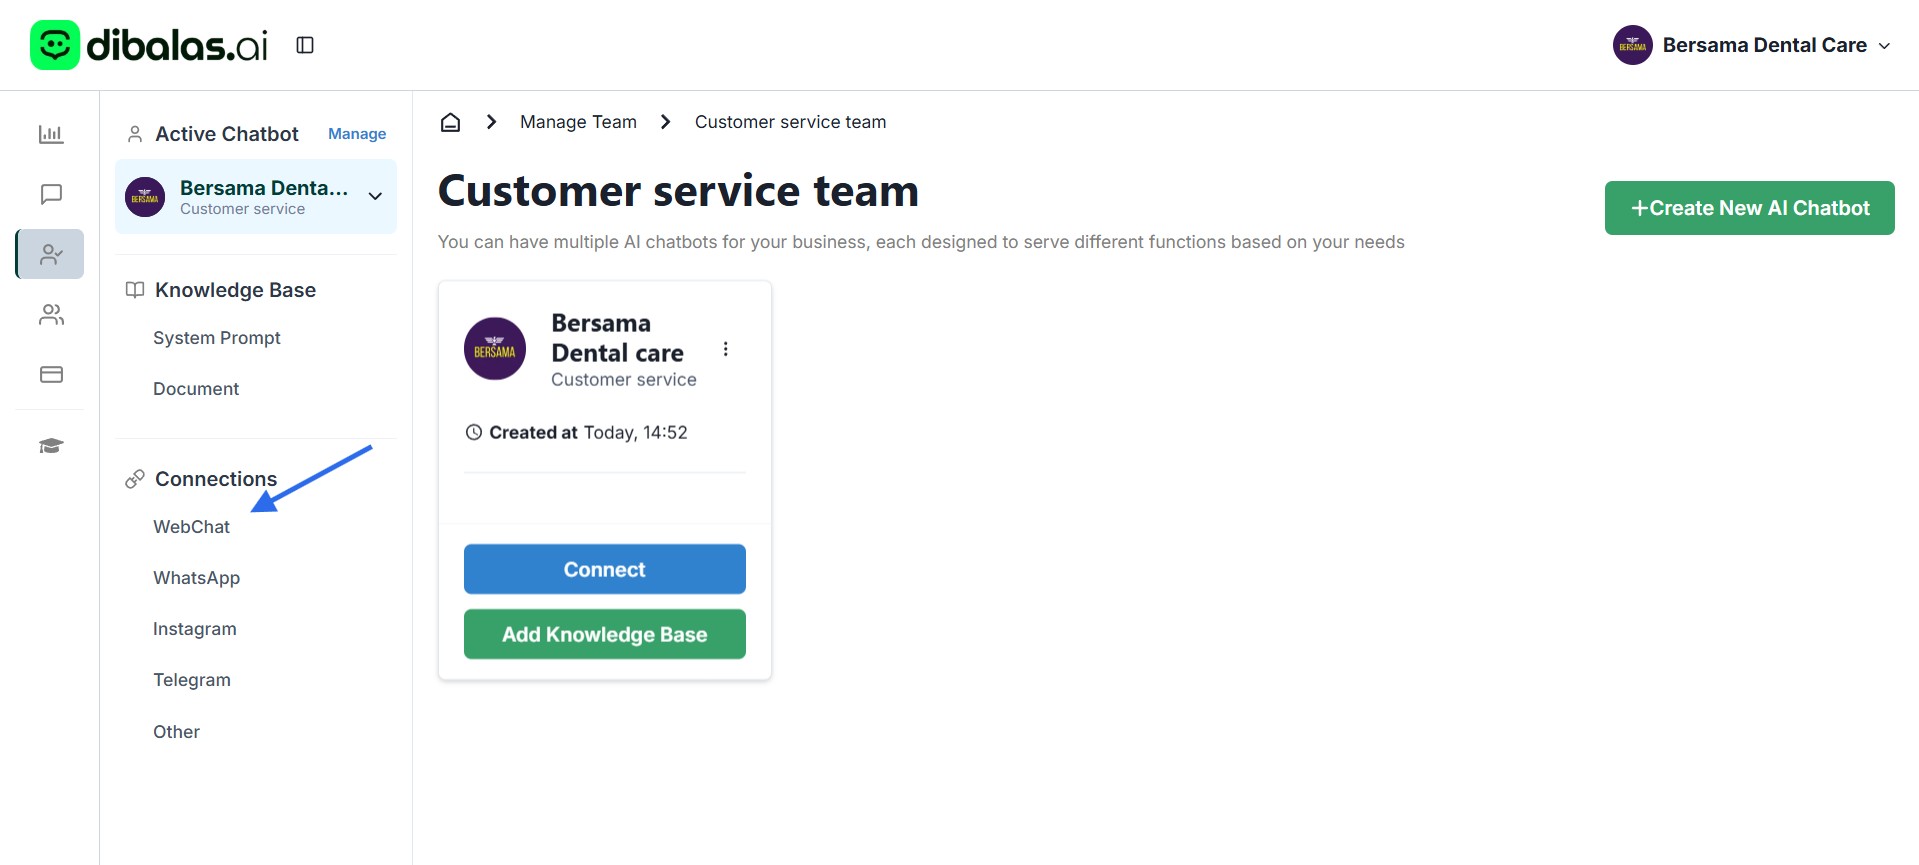
- You can add connection below"
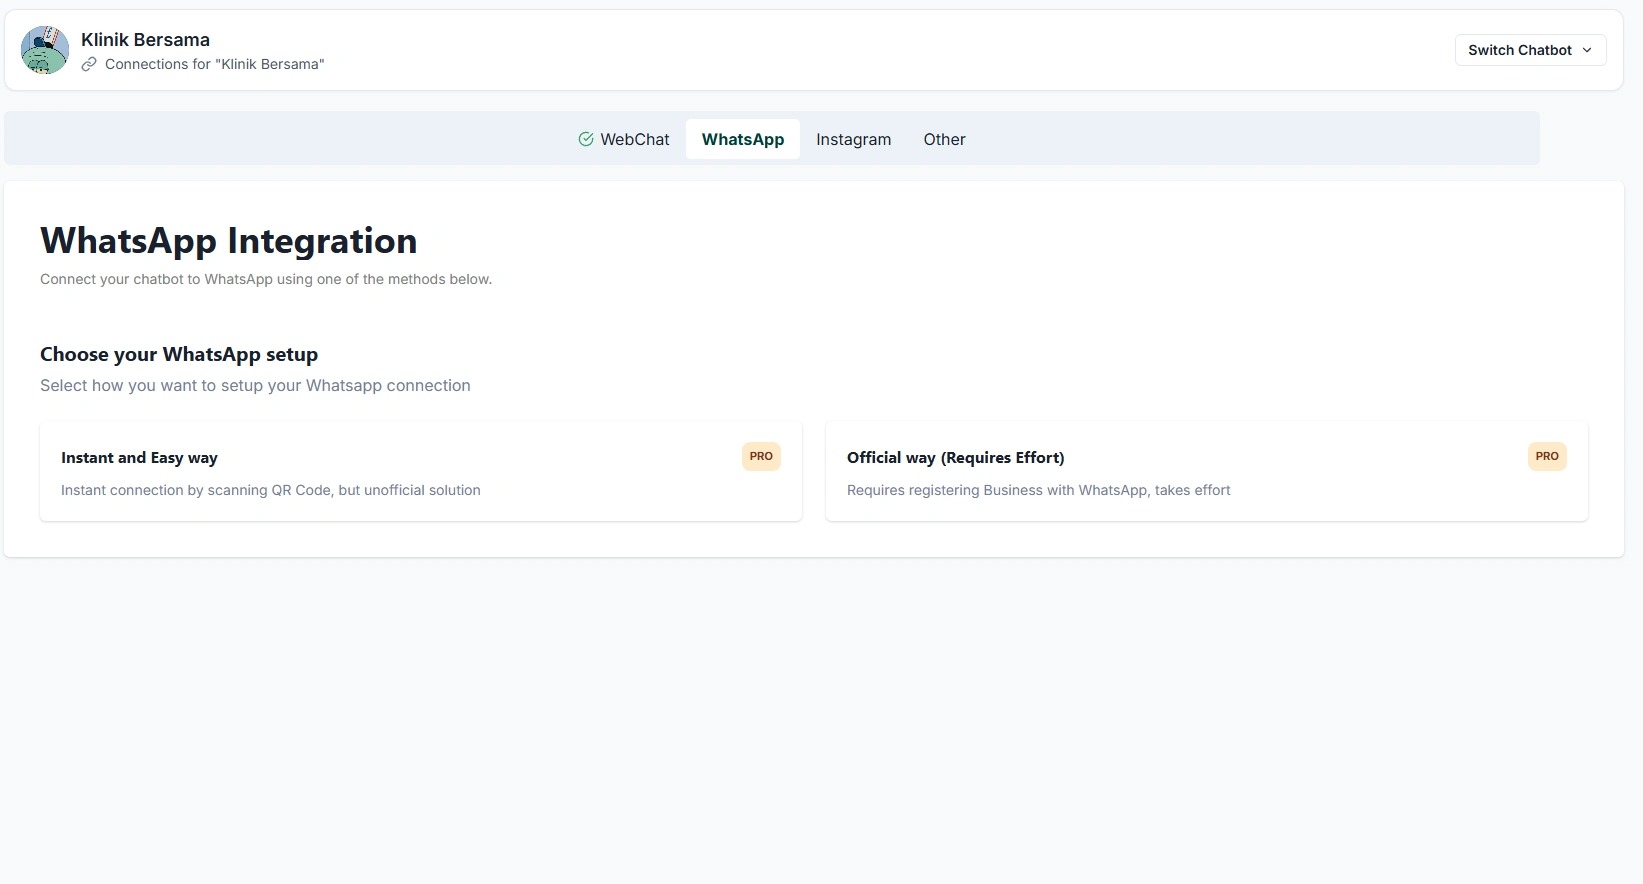
In the “WhatsApp” tab, you can connect your WhatsApp account or link the dibalas.ai Android app.
🔗 WhatsApp Connection Options
There are two types of connections you can choose from:
-
Official Connection
-
Uses Meta’s official channel (WhatsApp Business API).
-
Requires a business registration process, company identity verification, and Meta’s approval.
-
Pros: Stable, secure, and ideal for long-term business use.
-
Cons: Longer activation time and requires business documents.
-
-
Instant Connection
-
Quick and easy setup with no business verification needed.
-
Pros: Perfect for testing or small businesses just getting started.
-
Cons: Not an official Meta connection, so there’s a higher risk of being blocked.
-
In summary:
-
If you’re just starting or need a quick setup → choose Instant Connection.
-
If your business is growing and you need reliability → choose Official Connection.
⚠️ Tips Before Using Instant Connection
To minimize the risk of your WhatsApp account being blocked, do the following before connecting your account:
-
Use a WhatsApp Number That Has Been Active for at Least 1 Week
-
Ideally, use a number that has been active for more than 30 days.
-
Avoid using brand-new numbers that haven’t been used before.
-
-
Perform Normal Activities Before Connecting
Use your WhatsApp account naturally so it appears authentic:-
Send and receive messages from several contacts.
-
Use voice notes and stickers.
-
Send photos or videos.
-
Make short voice or video calls.
-
These activities help prevent your account from being flagged as a bot or spammer by WhatsApp’s system.
🧭 How to Connect
-
Tap “Connect” to use Instant Connection.
-
Tap “Generate QR Code” to use Official Connection.
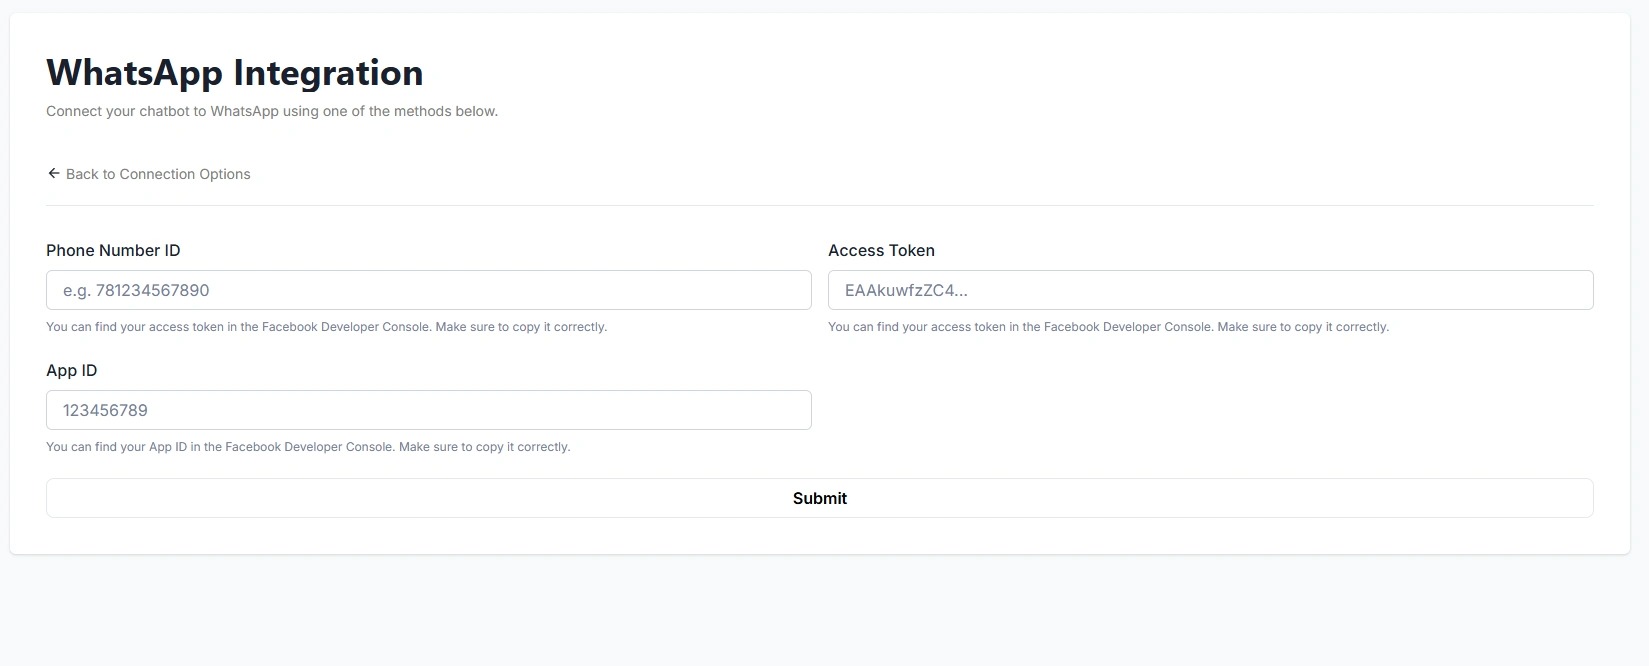
Official WhatsApp Connection
Enter your Phone Number ID, Access Token, and App ID, which you can obtain from your Meta Business account.
After that, click the “Submit” button to save the settings.
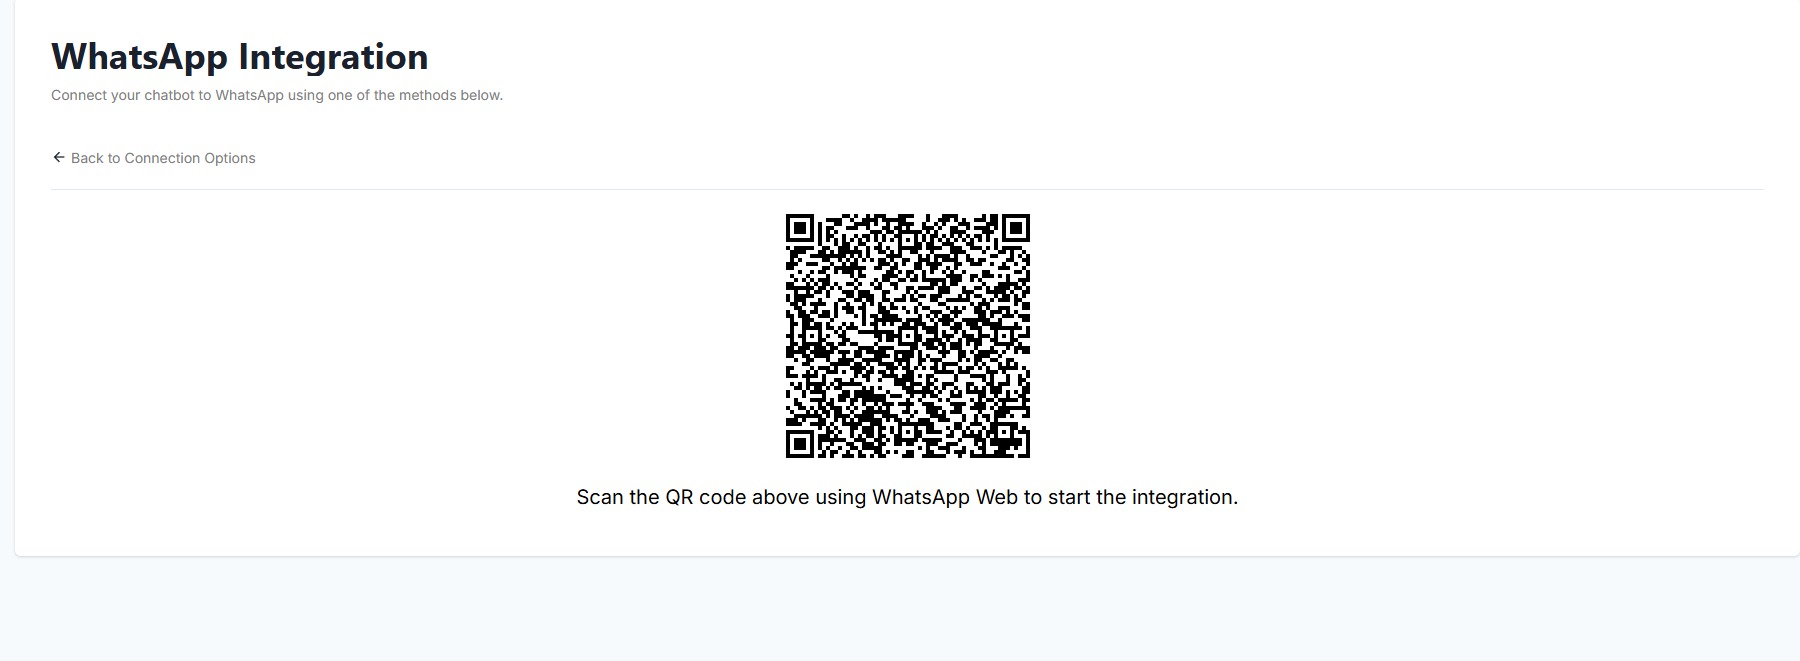
Instant WhatsApp Connection
To use the instant connection feature, simply link your WhatsApp account by scanning the QR code through the “Linked Devices” menu in the WhatsApp app on your Android phone.
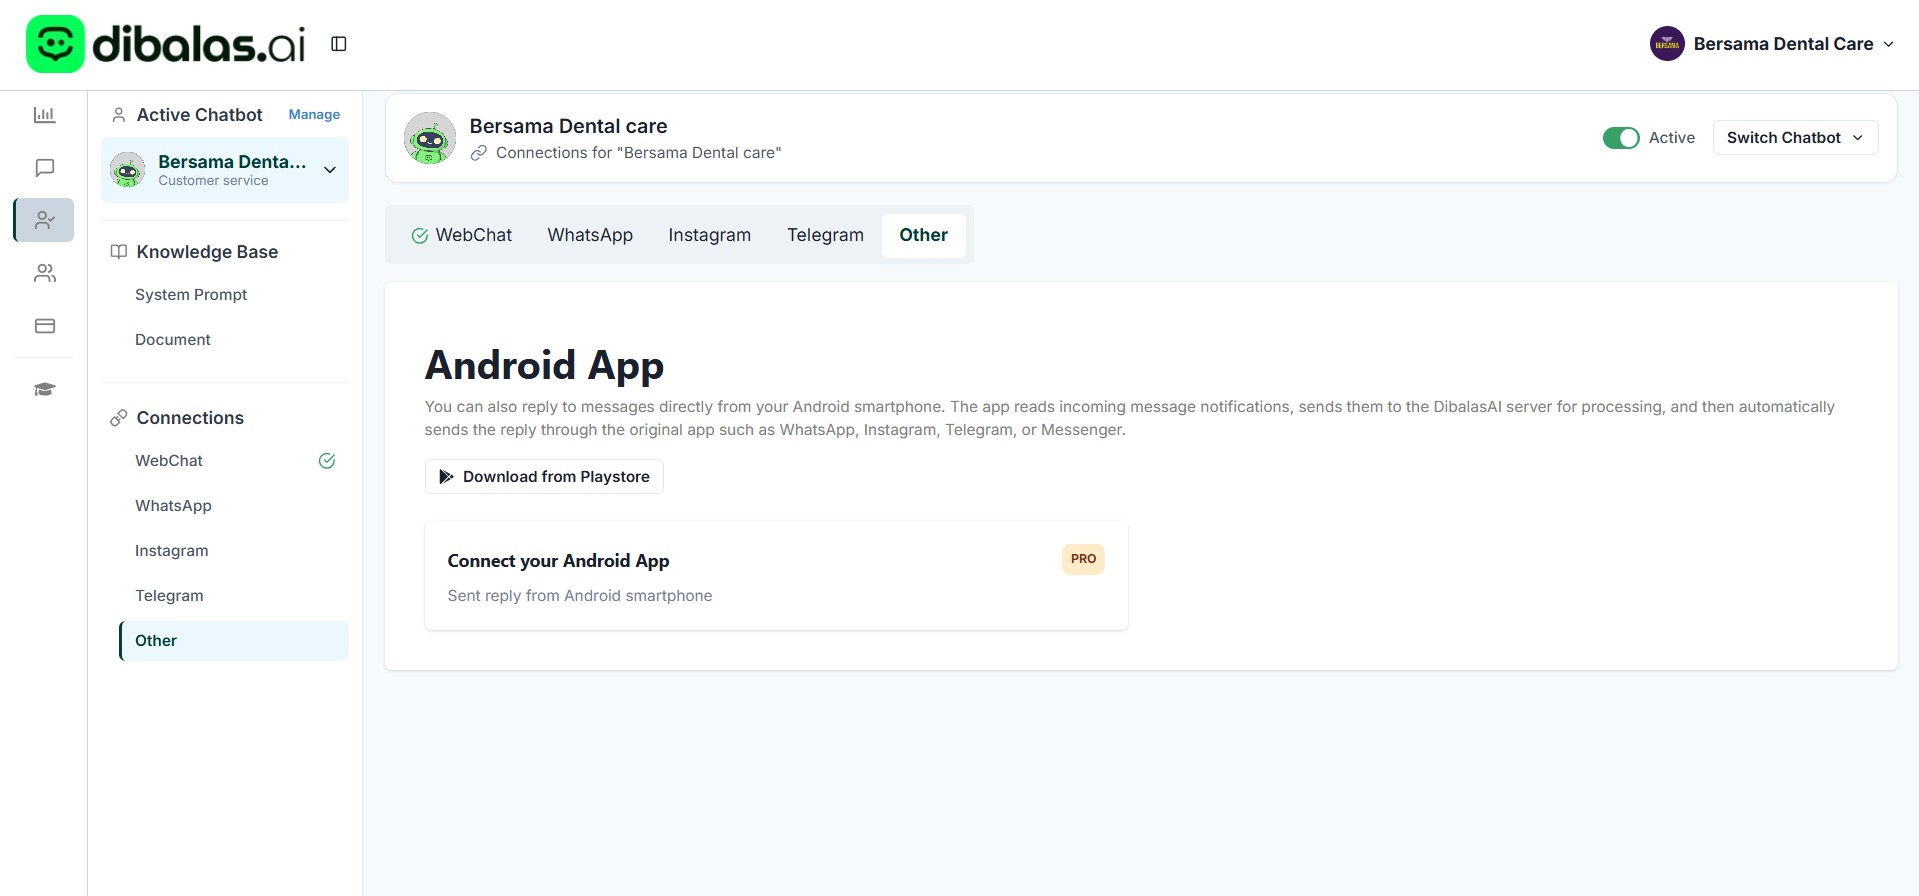
Android App – Dibalas.ai
dibalas.ai Android app works by reading notifications on your phone.
To use it:
-
Download and install the dibalas.ai app on your phone.
-
Log in using the same email as your dibalas.ai website account.
-
Tap “Activate Android App” on the connection page to link the app with your account.
Tap “Enable Android App” to start using your chatbot through the Dibalas.ai app on your Android phone.
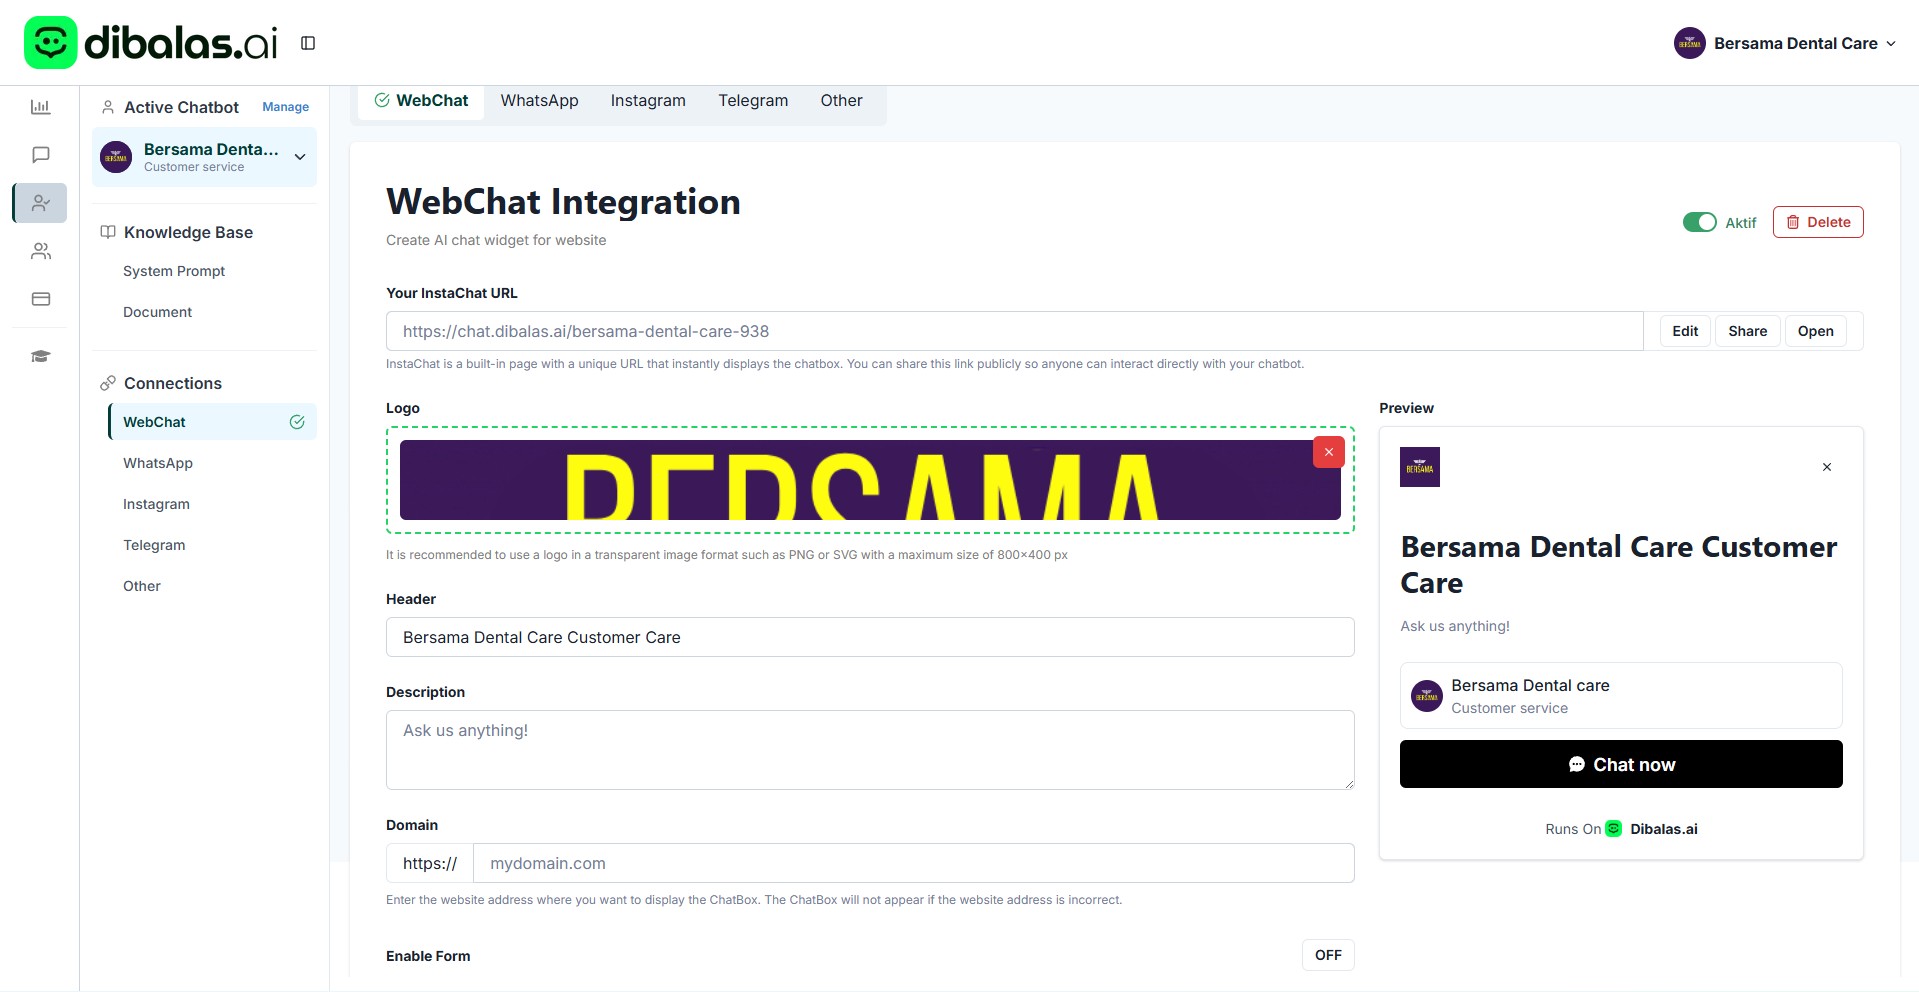
Webchat Widget
In this tab, you can integrate your website with dibalas.ai, allowing the live chat feature from dibalas.ai to appear on your business website.
Follow these steps to set up your live chat:
-
Upload your business icon.
If you don’t upload an icon, the system will use the default dibalas.ai icon. -
Fill in the header and description.
These will be displayed on your website’s live chat interface. -
Enter your website’s URL or domain.
-
Select a live chat template that best fits your needs.
Once all the information is filled out, click "Save Configuration" to save your settings.
 5. After you’re done, click ‘Save Configuration’.

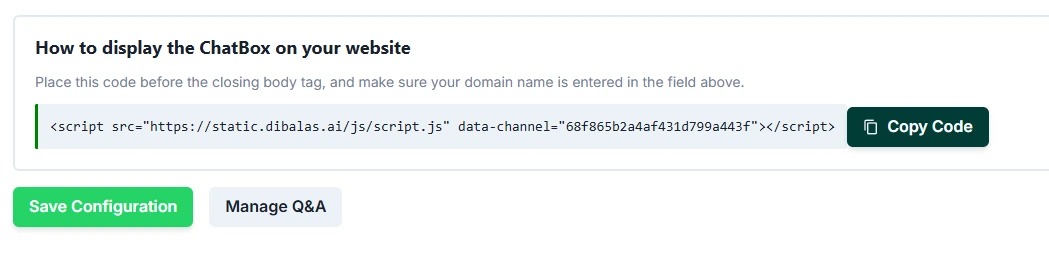
- After the data has been successfully saved, please copy the provided code.
Follow the instructions displayed above the code to enable the live chat feature on your business website.
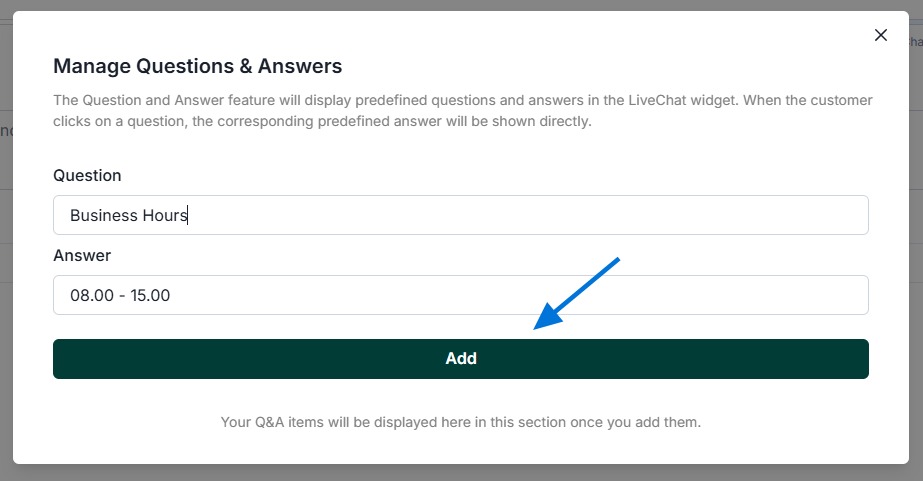
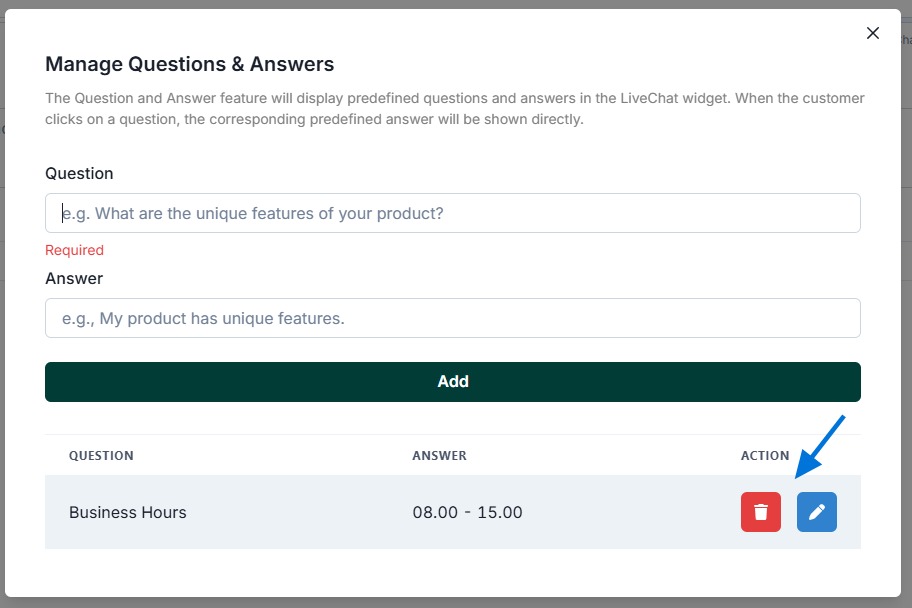
You can also add a list of questions and answers (Q&A) that will appear in the live chat.
Click the “Manage Q&A” button to add or edit them.
- Enter the question and answer, then click ‘Add’
- You can changed the Q&A and also deleted it
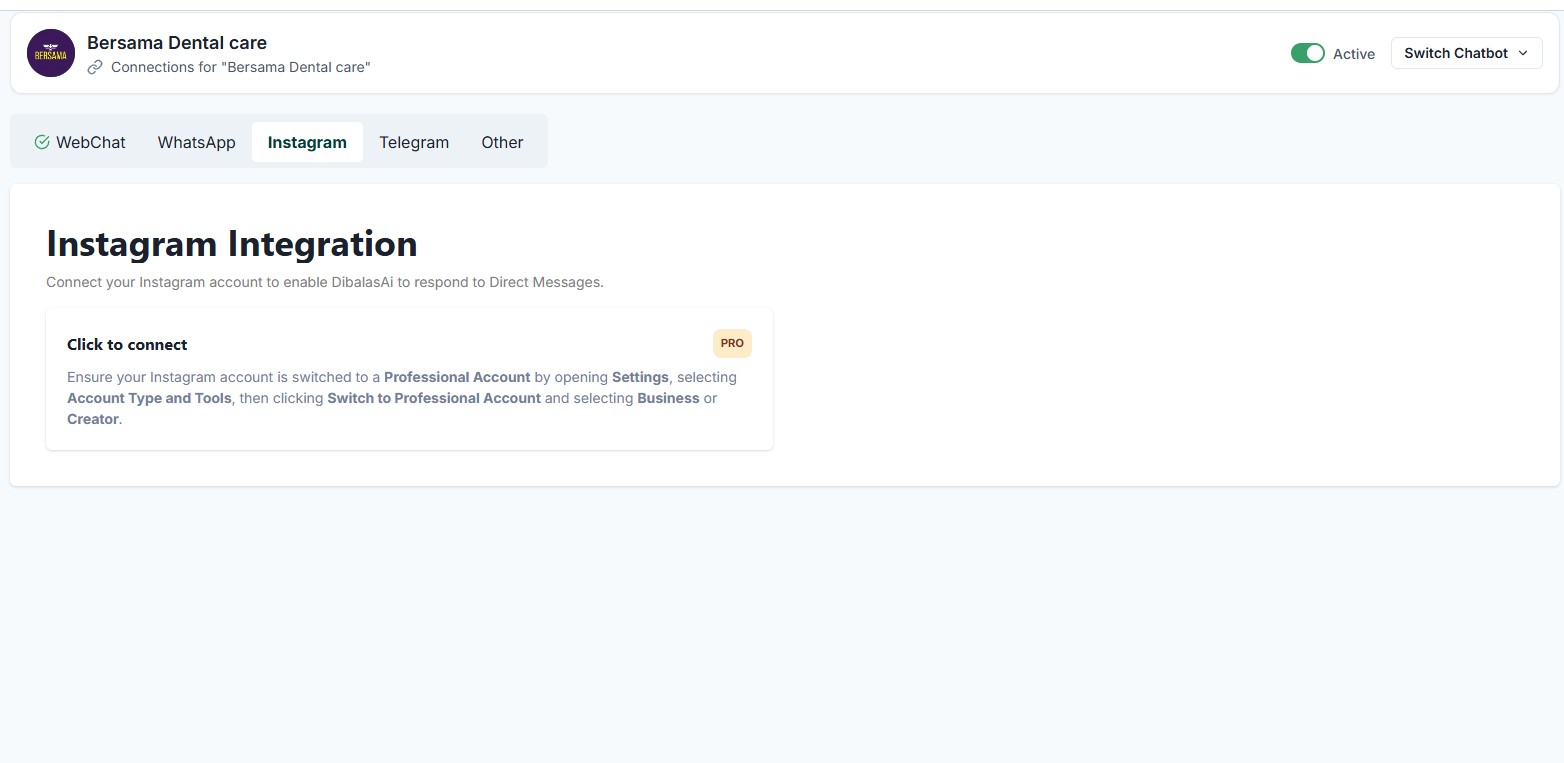
Make sure your Instagram account has been switched to a professional account before connecting it to dibalas.ai. Additionally, ensure that the Instagram account has never been connected to dibalas.ai before. Please note that one Instagram account can only be connected to one chatbot.
To integrate your business’s Instagram account with dibalas.ai, simply click the “Integrate with Instagram” button.
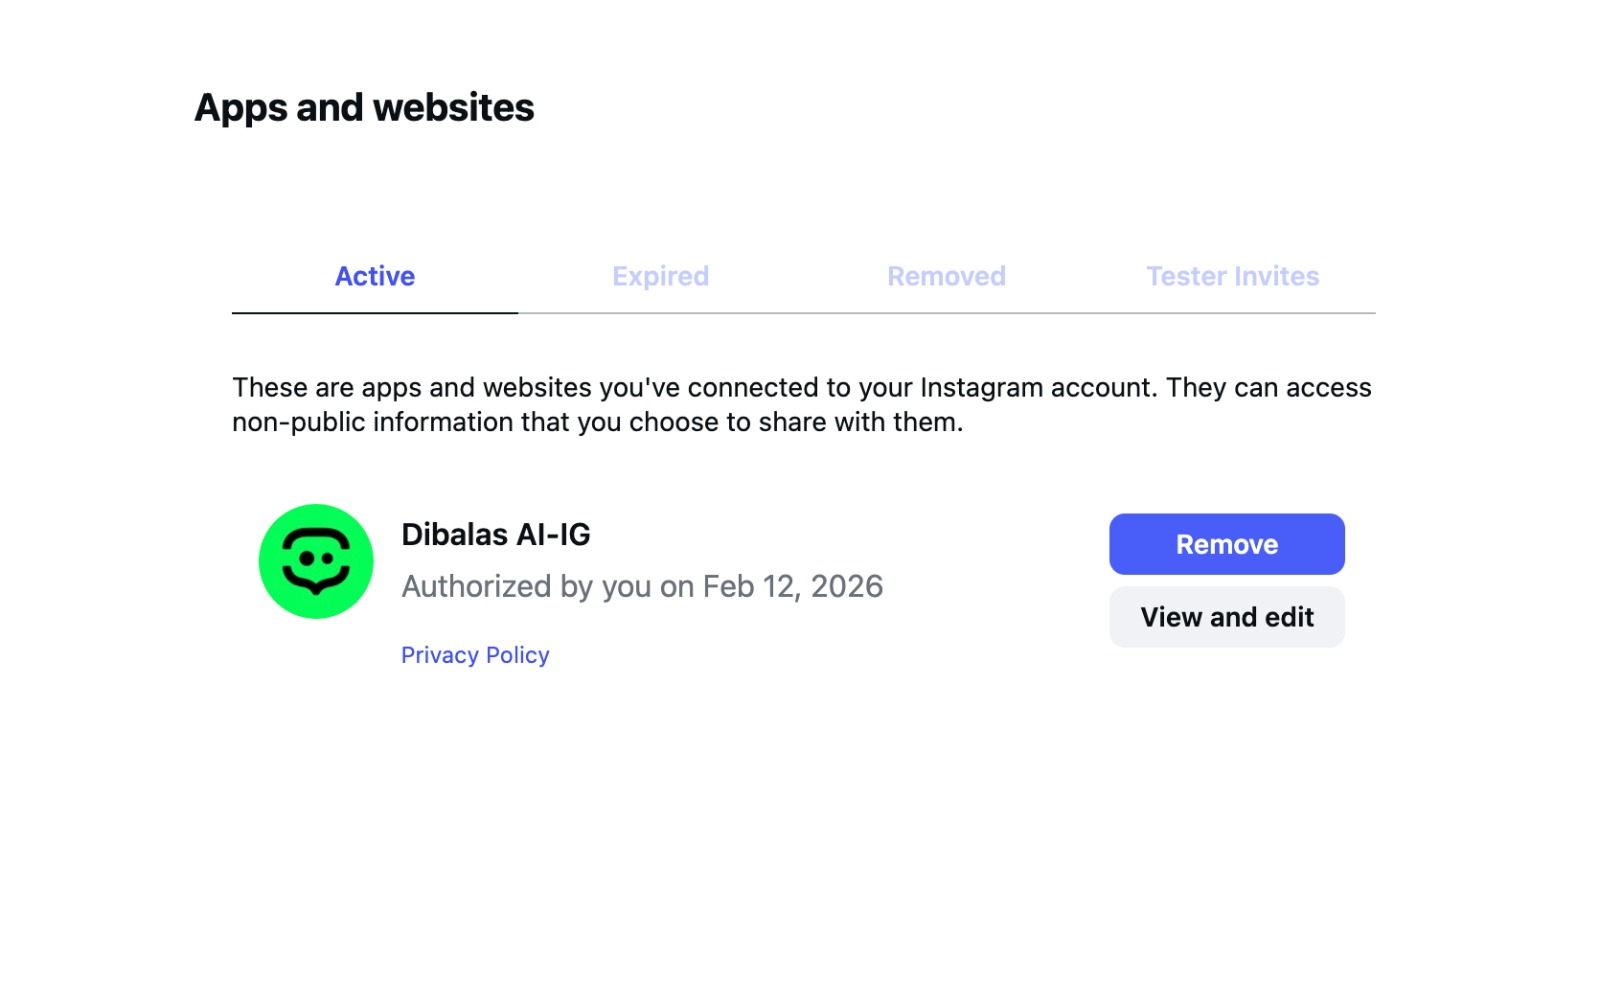
 To remove the Instagram connection, please delete it directly from your Instagram account by going to Settings > Website Permissions > Apps and Websites, then find the DibalasAI IG connection and click the Remove button.
After it is removed from Instagram, the connection in the DibalasAI dashboard will be automatically removed.
However, if you remove the connection from the DibalasAI dashboard, the connection on Instagram will not be automatically removed. You will still need to remove it manually through the Instagram Settings page.
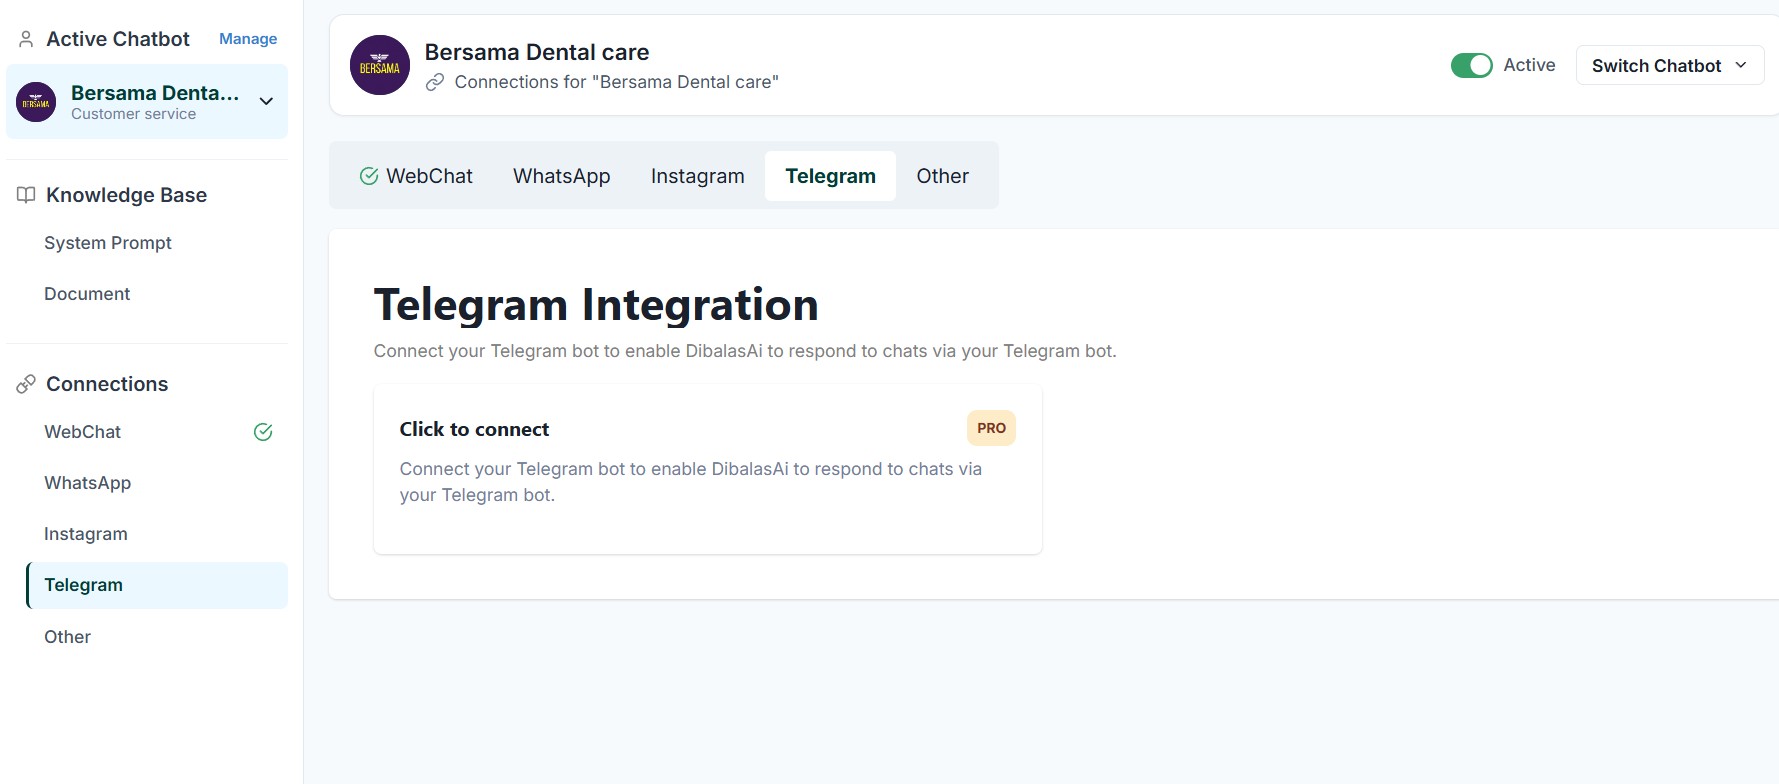
Telegram
You can link your Telegram bot to activate DibalasAi, allowing it to respond to chats via your Telegram bot. How to get Telegram Bot Token:
- Open Telegram and search for @BotFather.
- Start a chat and send the command /newbot.
- Follow the instructions to name your bot and choose a username.
- Copy the API Token provided by BotFather.
- Paste the token into the field that appears on the Telegram connection page after you click “Click to Connect.”
You can view the connections linked to your chatbot on the Chatbots page.
In the example below, the chatbot is connected to Live Chat/Webchat.